My studio in Fairport, NY needed a new "gritty" background to use for high school senior pictures. Because my mantra is making my senior pictures look different than everyone else's, I didn't want to buy a background that anyone can buy...I wanted to make my own unique background that would make an impression. With a little of DIY construction and faux painting, the studio now has a background that is one-of-a-kind and will look great behind a senior boy who wants a certain kind of "look".
Many of my backgrounds start out as a 4 ft. x 8 ft. sheet of 1/4 in. plywood, which I'll cut down to 4 ft. x 6 ft. Two grommets are added to one of the short sides and one of the long sides so that the background can be hung in both orientations. Once each side of the plywood is primed, each side can be individually painted for different backgrounds. If both sides are not primed, they will absorb moisture differently and the plywood will warp over time.
This particular background has a rusty industrial wall on one side and distressed leather on the other (a follow up blog post). For the faux industrial wall, I painted the base color on the background, which consisted of a medium-toned gray. I then painted "rusty" seams on the plywood, breaking it up into smaller panels. The seams consisted of layers of dark gray, brown, orange-brown and yellow-orange to replicate rusted edges of metal. I then spot painted streaks of lighter colored grey paint mixed with yellows and greens to add the streaky aged areas. After that I masked off a panel and sponged on some green-yellow-gray paint to simulate aged mold and distress.
Hand-painting a photography backdrop with a faux rusty steel industrial finish....base coat.
Once the aging of the metals was complete, I added the rust on the entire background by lightly adding a watered down mix of orange and brown using a spray bottle, spraying lightly in different areas, and then lightly blotting the wet paint immediately afterwards with a paper towel. The paint was allowed to run and drip in a few areas, but I was looking for a mottled rusty color over parts of the background.
Hand-painting a photography backdrop with a faux rusty steel industrial finish....adding rust.
The rivets were adding using the end of the handle of a foam paint brush dipped in light gray paint (lighter in color than the base coat). A crescent-shaped highlight of very light grey paint and a crescent-shaped shadow of dark gray paint was painted was added on each rivet to give it a 3-dimensional look. Another layer or two of rust was sprayed on after the rivets were added.
Hand-painting a photography backdrop with a faux rusty steel industrial finish...adding rivets.
I had previously made gears from 1 in. thick foam insulation and painted them to look rusty. The foam was cut using a DIY hot knife, which consists of a heated wire which cuts through the foam like a hot knife through butter. I will show the hot knife in a later blog post, but there are multitudes of examples show on YouTube. The foam gears were hot glued onto the background, leaving space in the center for the subject of the photographs. I added a little extra dimension by adding a foam block behind one of the gears to raise it off the background, which results in more of a shadow when the background is lit.


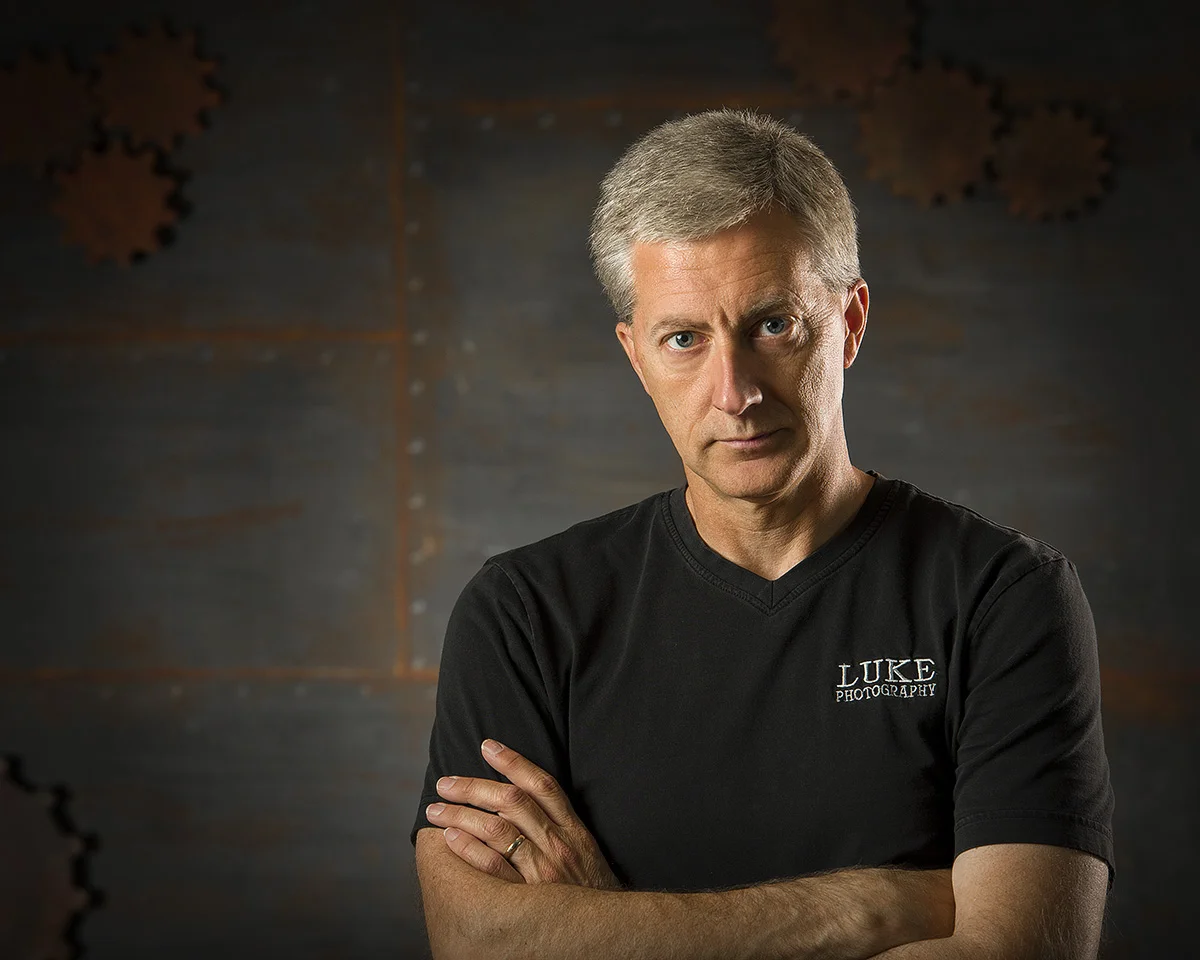
The background most likely will be lit with a hard, directional spot light as shown in the example, in which I stepped in front of the camera for my assistant. It shows a harder more dramatic light on both subject and background, which enhances the mood and look of the gritty, industrial portrait.
