
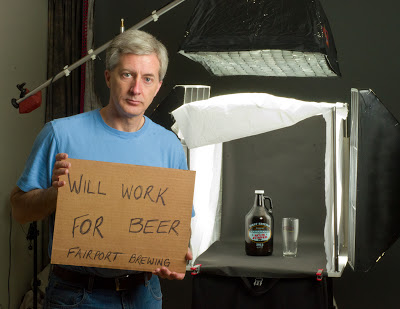
I recently started photographing various trademark beers for Fairport Brewing Company, a local microbrewery. Although all the foods and beverages that you see in magazine and television advertisements look deliciously steamy hot or refreshingly cold, nothing could be further from the truth. There is an art to making month-old, cold hamburgers look lip-smackingly good. And in this post, I’ll show you what makes you want to dive into room temperature, flat beer.
With the exception of some English beers that are preferable served less than cold, most beer is served cold, so that is what advertisers want you to see and crave. But again, what you see is rarely what it really is.
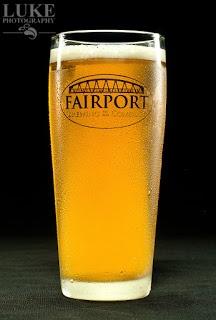
“Hero” Shot
 |
| Frosted with aerosol deoderant |
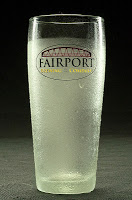 |
| Glycerine and water |
Next step is to spray the frosted area of the glass with a 50/50 water and glycerine mix. You can find glycerine in your local pharmacy…it’s in the “constipation” aisle…so don’t spend a lot of time there browsing.
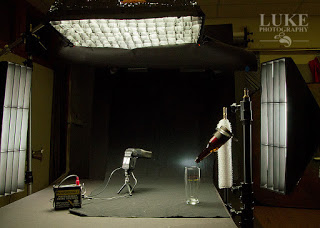
The glass is then placed in the lighting set-up, which included one overhead light in a gridded soft box and two side lights, each in a gridded strip box. These side lights were placed slightly behind the glass to add to the rim light effect of the glass and show off the water droplets.
 |
| Cardboard reflector |
The trouble with this lighting set-up is that there is not a lot of light going through the glass, and not matter what kind of beer you are photographing, it’s going to look dark and cloudy…and very unappetizing. The trick is to take a cardboard cutout similar to the shape of the glass and angle it directly behind the glass, so that it won’t show from the camera’s angle. This cardboard will reflect the light from the overhead soft box, and send it shooting through the glass, instantly elevating the status of the beer from dark and cloudy to refreshingly delicious. Hard to remember that it’s still warm and flat. And speaking of flat, when you are ready to photograph the beer, drop some salt in the glass. This will produce bubbles and bring back the head of the beer.
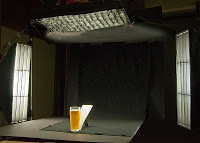 |
| Hero shot lighting setup |
As an alternative to shooting against a dark background, I also replaced the dark background with a large soft box, and adjusted the light in it to give me a nice white background. This produces a lot of light coming through the beer and avoids the dark, cloudy look altogether.
“Pour" Shot

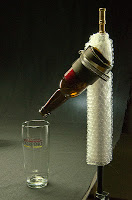 I took an empty beer bottle (I had several to choose from at home) and using a glass cutter purchased from my local big box hardware store, cut off the bottom of the bottle and sanded the edges to they were smooth and would not cut my tender fingers.. I then clamped the bottomless bottle of beer…which is the ultimate fantasy….to a light stand. Doing this allowed me to place the glass and the bottle in exactly the same position for each and every shot, and I simply just pour a cup of beer into the open part of the bottle while firing the camera.
The logo on the glass did not show up well against the dark background in the first several shots, so I added a small snooted flash directed at the background, directly behind where the logo would appear in the photo.
Again, flat beer works best in this kind of photo. Otherwise, all you’ll be taking a photograph of is foam on the bottom of the glass, which is less tasty than the amber-colored goodness of grain, hops and yeast.